Adding Swagger (Open API) support to Asp.Net Web APIs
These days, APIs are everywhere. Be it internal APIs (APIs within the system) or external ones (exposed across systems), APIs are the base which enable huge systems to be scalable and maintainable. Dealing with such vast APIs and understanding its various methods can be daunting for a developer. This is where Swagger (also called Open API) can be useful.
So, what exactly is Swagger?
At its heart, Swagger is a language-agnostic specification for describing REST APIs.
Swagger has some advantages,
- It helps to better understand capabilities of a service without any direct access to the implementation.
- Helps minimize the amount of work needed to connect disassociated services.
- Reduces the amount of time needed to accurately document a service.
As part of this walkthrough, we’ll focus on using the Swashbuckle.AspNetCore open source implementation for generating Swagger documents for ASP.Net Core Web Apis.
How Swagger really works?
The core to the Swagger specification is the document named swagger.json and is generated by the Swagger implementation. It describes the capabilities of the API and how to access it using HTTP.
The toolchain also comes with a Swagger UI, which basically uses the json document and displays it in a web-based UI.
Adding the Swagger implementation to Asp.Net Web APIs
For this walkthrough we’ll quickly bootstrap a Asp.Net Web API project that comes out of the box with .Net Core and add Swagger to it.
1. Create a Asp.Net Web API project
Lets create the Asp.Net Web API project TestBasicSwaggerAPISupport as..
PS C:\dev\NetCore\TestBasicSwaggerAPISupport> dotnet new webapi
The template "ASP.NET Core Web API" was created successfully.
This template contains technologies from parties other than Microsoft, see https://aka.ms/template-3pn for details.

Processing post-creation actions...
Running 'dotnet restore' on C:\dev\NetCore\TestBasicSwaggerAPISupport\TestBasicSwaggerAPISupport.csproj...
  Restoring packages for C:\dev\NetCore\TestBasicSwaggerAPISupport\TestBasicSwaggerAPISupport.csproj...
  Restore completed in 122.69 ms for C:\dev\NetCore\TestBasicSwaggerAPISupport\TestBasicSwaggerAPISupport.csproj.
  Generating MSBuild file C:\dev\NetCore\TestBasicSwaggerAPISupport\obj\TestBasicSwaggerAPISupport.csproj.nuget.g.props.
  Generating MSBuild file C:\dev\NetCore\TestBasicSwaggerAPISupport\obj\TestBasicSwaggerAPISupport.csproj.nuget.g.targets.
  Restore completed in 2.01 sec for C:\dev\NetCore\TestBasicSwaggerAPISupport\TestBasicSwaggerAPISupport.csproj.

Restore succeeded.
This project has a single controller - ValuesController.cs.
We can host the project using dotnet run and try accessing the API http://localhost:<random_port>/api/values from the browser.
This would show the json output as

Now, this was a very basic API implementation with a simple response. However, in actual projects you can have very complex APIs requiring multiple parameter inputs and a complex Json response.
2. Add Swagger to the Web API project
Lets now add the Swagger toolchain to this project and check how it makes it easier to deal with APIs. To do this, we’ll have to install the nuget package Swashbuckle.AspNetCore This package has 3 main components
A Swagger object model and middleware to expose SwaggerDocument objects as JSON endpoints
- Swashbuckle.AspNetCore.SwaggerGen
A Swagger generator that builds SwaggerDocument objects directly from your routes, controllers, and models - Swashbuckle.AspNetCore.SwaggerUI
A Swagger UI tool which interprets Swagger JSON to build a rich, customizable experience for describing the Web API functionality. It includes built-in test harnesses for the public methods.
We can install the package using
PS C:\dev\NetCore\TestBasicSwaggerAPISupport> dotnet add TestBasicSwaggerAPISupport.csproj package Swashbuckle.AspNetCore
  Writing C:\Users\sukamath\AppData\Local\Temp\tmp67D9.tmp
info : Adding PackageReference for package 'Swashbuckle.AspNetCore' into project 'TestBasicSwaggerAPISupport.csproj'.
log  : Restoring packages for C:\dev\NetCore\TestBasicSwaggerAPISupport\TestBasicSwaggerAPISupport.csproj...
info :   GET https://api.nuget.org/v3-flatcontainer/swashbuckle.aspnetcore/index.json
info :   OK https://api.nuget.org/v3-flatcontainer/swashbuckle.aspnetcore/index.json 916ms
info : Package 'Swashbuckle.AspNetCore' is compatible with all the specified frameworks in project 'TestBasicSwaggerAPISupport.csproj'.
info : PackageReference for package 'Swashbuckle.AspNetCore' version '2.3.0' added to file 'C:\dev\NetCore\TestBasicSwaggerAPISupport\TestBasicSwaggerAPISupport.csproj'.
3. Configuring the Swagger middleware
Now that the package is installed, we can add and configure the Swagger middleware.
public void ConfigureServices(IServiceCollection services)
{
    services.AddMvc();

    // Register the Swagger generator, defining one or more Swagger documents
    services.AddSwaggerGen(c =>
    {
        c.SwaggerDoc("v1", new Info { Title = "TestAPI", Version = "v1" });
    });
}

public void Configure(IApplicationBuilder app, IHostingEnvironment env)
{
    if (env.IsDevelopment())
    {
        app.UseDeveloperExceptionPage();
    }

    // Enable middleware to serve generated Swagger as a JSON endpoint.
    app.UseSwagger();

    // Enable middleware to serve swagger-ui (HTML, JS, CSS, etc.), specifying the Swagger JSON endpoint.
    app.UseSwaggerUI(c =>
    {
        c.SwaggerEndpoint("/swagger/v1/swagger.json", "TestAPI V1");
    });

    app.UseMvc();
}
We can now launch the app and navigate to http://localhost:<random_port>/swagger/v1/swagger.json.
This will provide the Swagger specification endpoints.

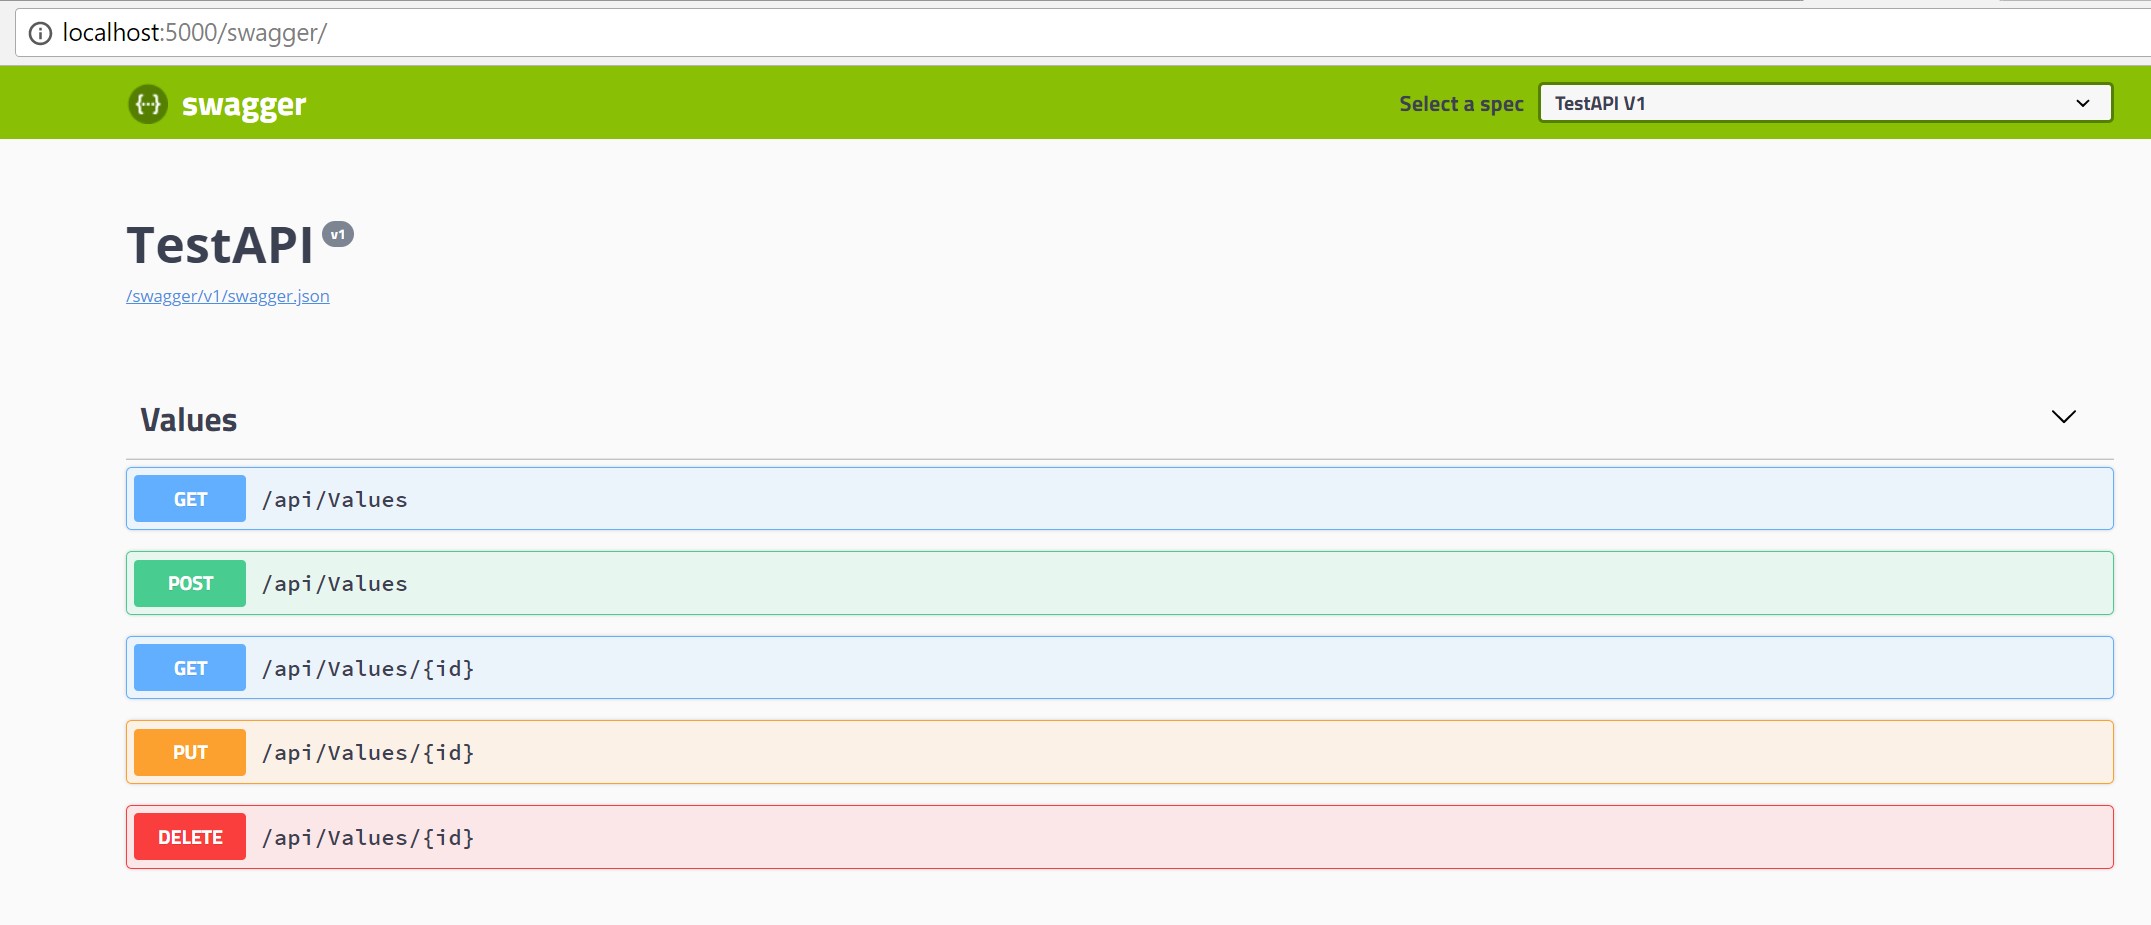
The same can be viewed via Swagger UI at http://localhost:<random_port>/swagger

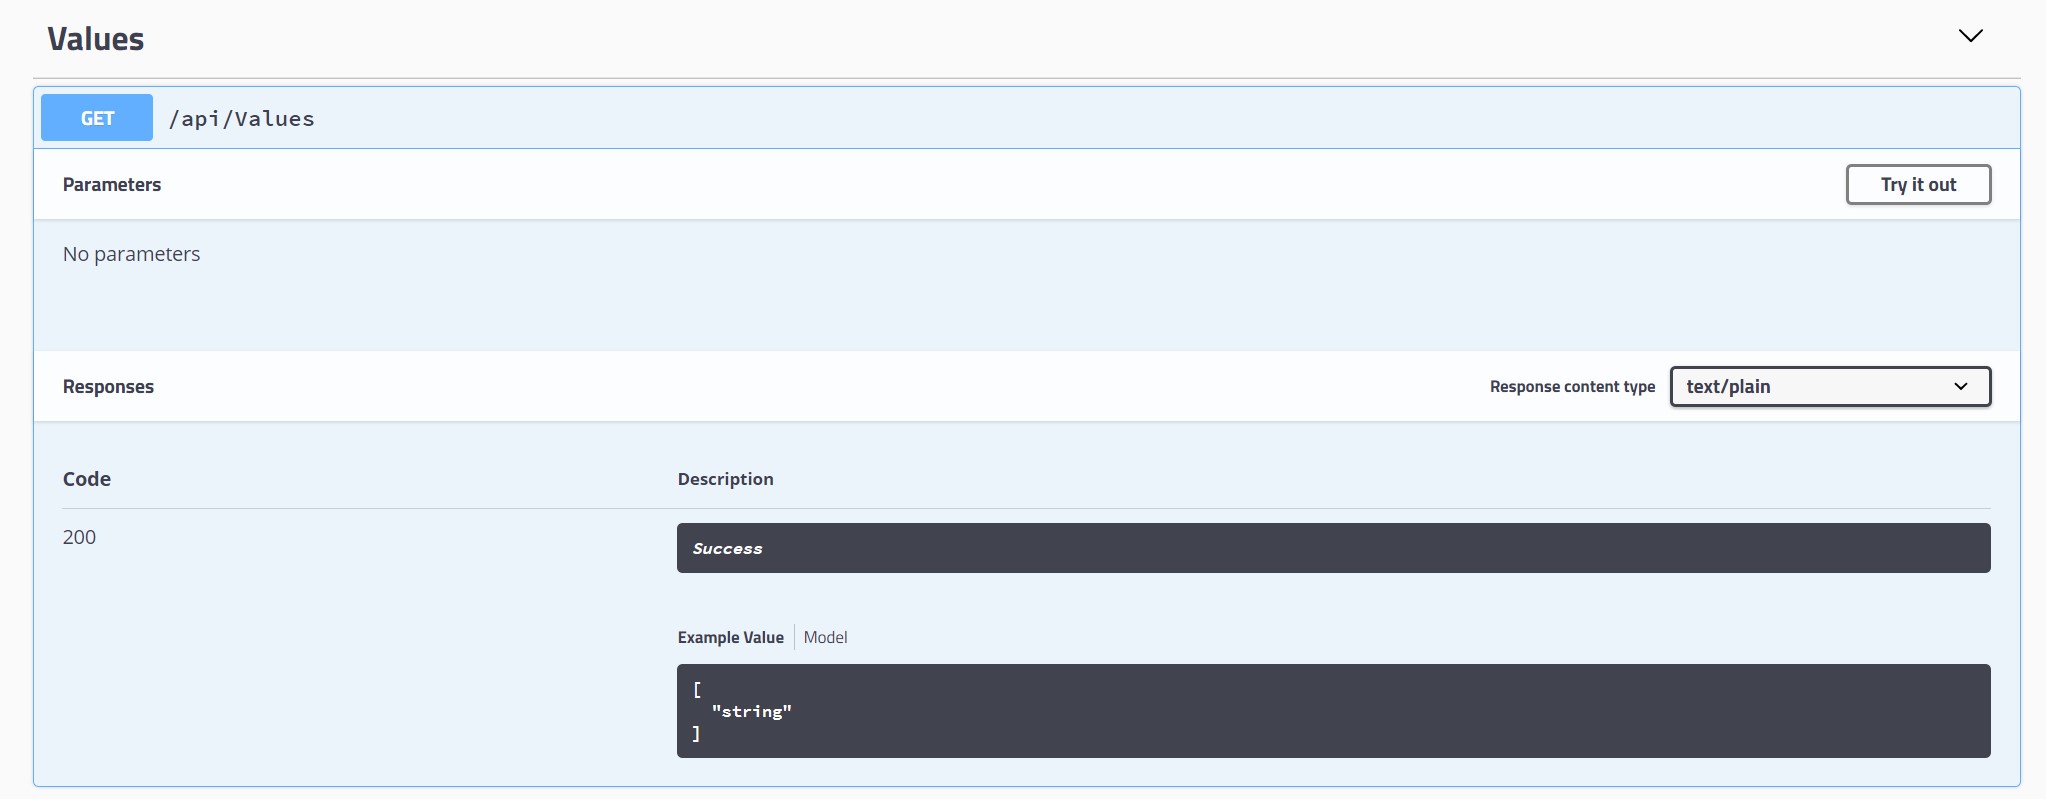
You can click on the individual APIs and click on the Try it out button to actually provide input parameters and run the API.

4. Add details to the Swagger document
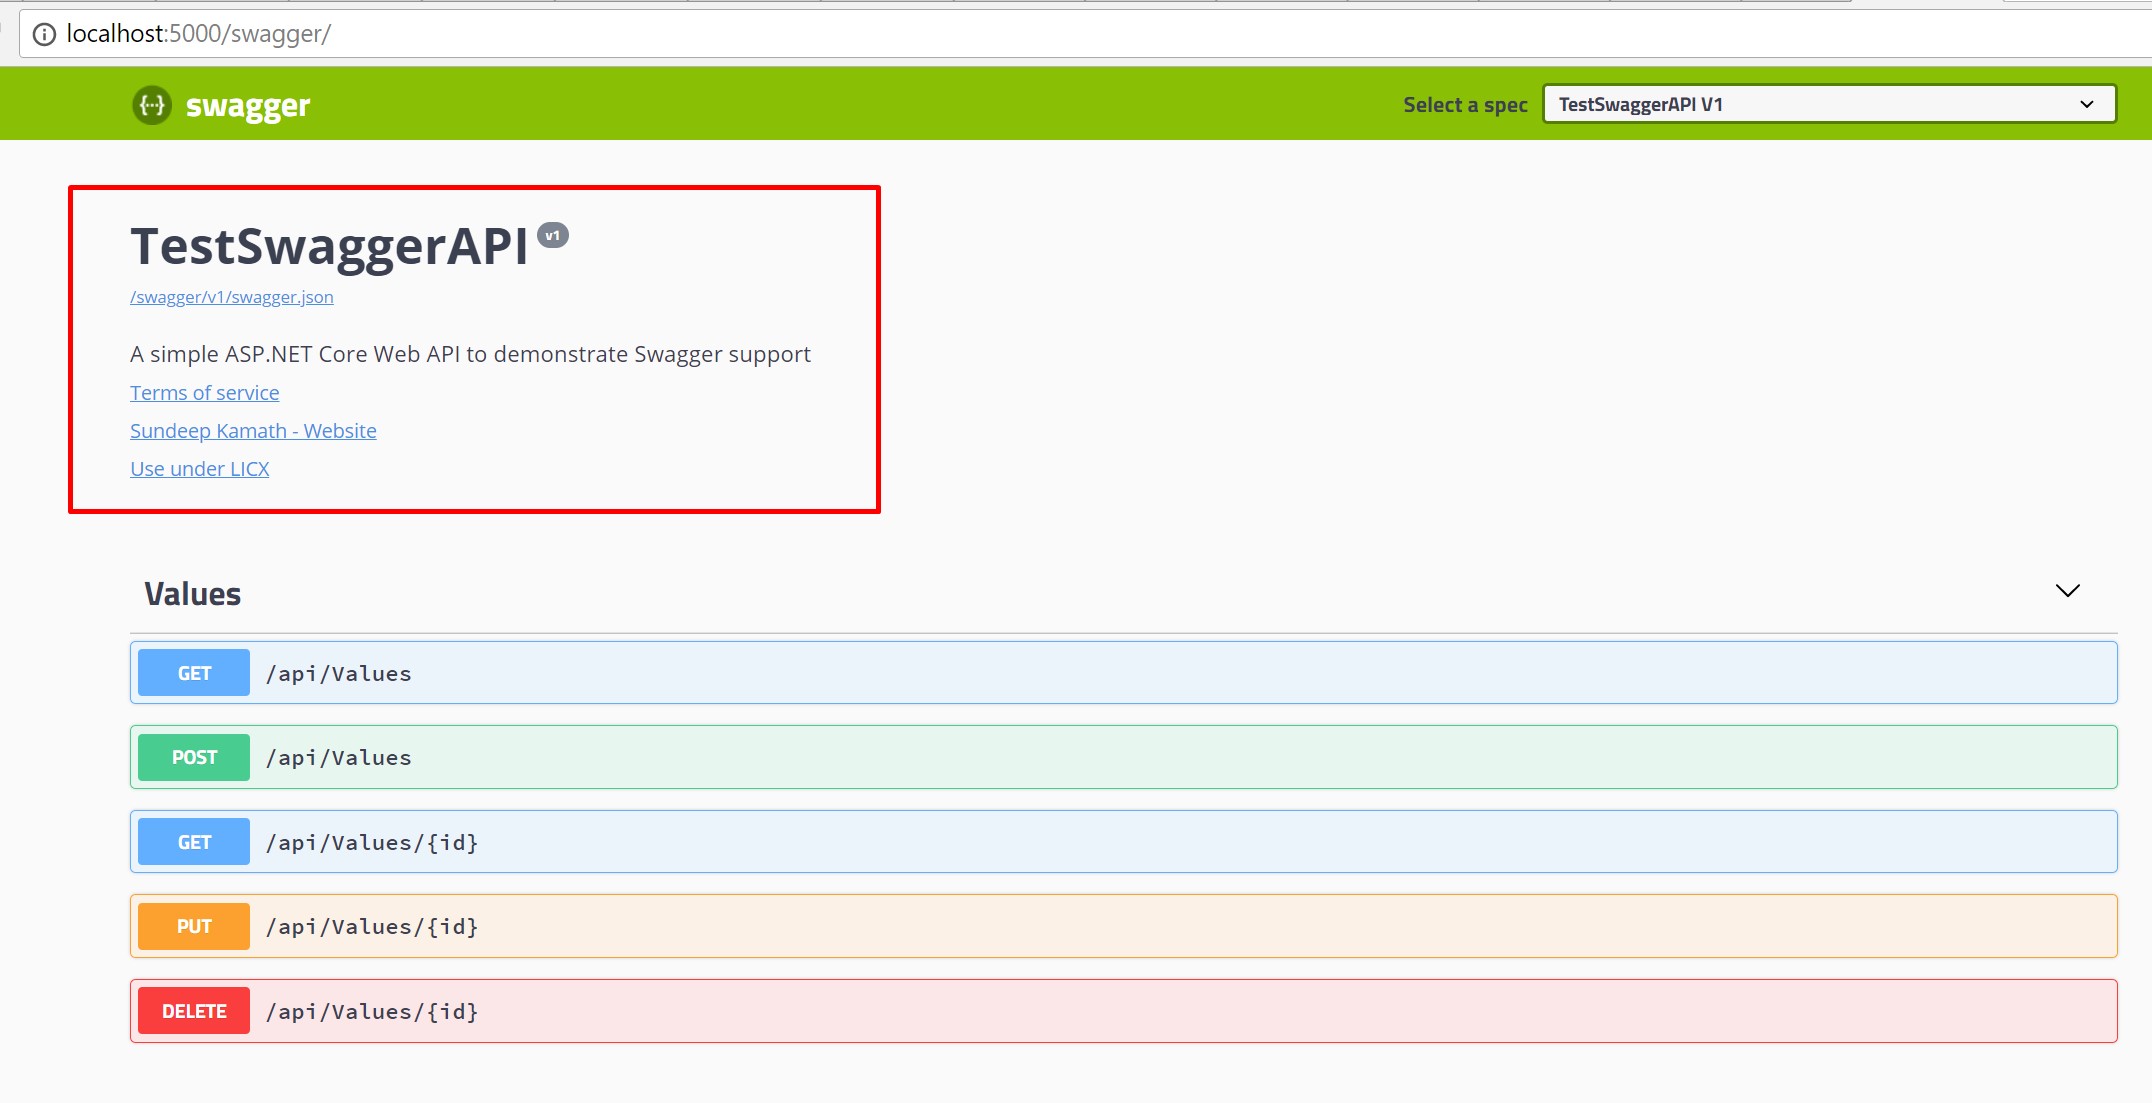
Further to this, we can use the AddSwaggerGen method to add information such as author, license and description.
// Register the Swagger generator, defining one or more Swagger documents
services.AddSwaggerGen(c =>
{
    c.SwaggerDoc("v1", new Info
    {
        Version = "v1",
        Title = "TestSwaggerAPI",
        Description = "A simple ASP.NET Core Web API to demonstrate Swagger support",
        TermsOfService = "None",
        Contact = new Contact { Name = "Sundeep Kamath", Email = "", Url = "http://sundeepkamath.in" },
        License = new License { Name = "Use under LICX", Url = "https://example.com/license" }
    });
});
This will show up in the Swagger UI as …

That’s it!! We have our Web APIs up and running with Swagger documentation support.
You may clone a working version of this project from my GitHub Repository here.
There are some additional configurations that can be done to improvise the Swagger support further. I’ll take these up in a separate post.
Hope this was useful!!

Leave a Comment